

Hey Wild Whisper Fans, Katelyn here! For today's post, I created this Dream Wall Hanging. To create my wall hanging, I've used the Media Assemblage Paper Pack and Bubble Snap Stamp by Nicole Wright Designs as well as the Brush Script Stamp Set. You'll want to grab a cup of your favourite fall beverage and learn how to recreate my wall hanging at home.
Choose a piece of patterned paper out of the Media Assemblage Paper Pack. Die cut a 4 1/2" Stitched Indented Rectangle out of the patterned paper.
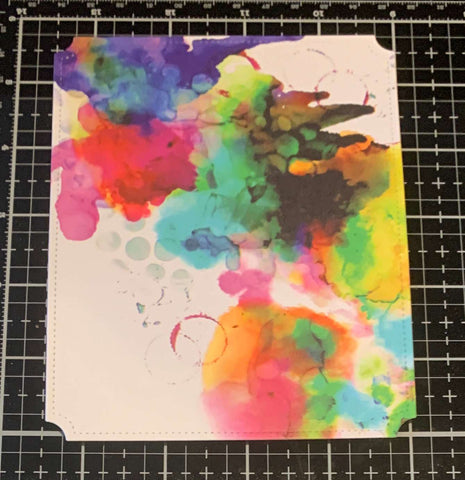
Apply Jet Black Archival Ink to the Bubble Snap Stamp Set and stamp randomly on the 4 1/2" rectangle as desired a total of seven times. Reapply ink the stamp as needed.

Distress the edges of the rectangle. Ink the edges of the rectangle using Black Soot Distress Ink and a blending tool with foam.

Next, you'll need the same piece of patterned paper you cut the rectangle out of. From the same side you cut the rectangle out, cut a piece that measures 1 5/8" x 5". Flip the paper over and cut a piece that measures 3" x 4". Distress the edges of each paper. Ink the edges of both papers using Black Soot Distress Ink and a blending tool with foam.

Choose another piece of patterned paper. Cut a piece that measures 3" x 3". Distress the edges of the paper. Ink the edges of the paper using Black Soot Distress Ink and a blending tool with foam.

Choose another piece of patterned paper. Cut a piece that measures 1 3/4" x 3 1/2". Distress the edges of the paper. Ink the edges of the paper using Black Soot Distress Ink and a blending tool with foam.

Choose one more piece of patterned paper. Cut one piece that measures 2" x 4 1/2" and cut another piece that measures 2 1/4" x 2 1/4". From the Brush Script Stamp Set, you'll need the letters to spell out dream. Apply Jet Black Archival Ink to the letters and stamp onto the paper. Fussy cut around the word. Flip the paper over and die cut a 2 1/2" circle out of it. Distress the edges around the circle and the other two patterned papers. Ink the edges of the word strip, circle and two other patterned papers.

Foam square the 1 5/8" strip 1 1/4" from the left and 1/2" from the top of the rectangle. Use adhesive and foam squares to adhere the 2" x 4 1/2" strip 1/2" from the right and 3/4" from the top of the rectangle.

Use adhesive and foam squares to adhere the 3" x 4" piece 1/2" from the left and 1" from the top of the rectangle. Adhere the 1 3/4" strip 1 5/8" from the left and 1 1/4" from the top of the rectangle. Use foam squares to adhere the 3" square 7/8" from the left and 1 1/2" from the top of the rectangle.

Adhere the 2 1/4" square 1" from the left and 2" from the top of the rectangle. Foam square the circle 1 1/2" from the left and 1" from the bottom of the rectangle. Use adhesive and foam squares to adhere the dream word to the middle of the circle as desired.

To finish the wall hanging, punch two holes at the top of the wall hanging. Tie a piece of white twine through each hole.

Here are a few closeups of the finished wall hanging.

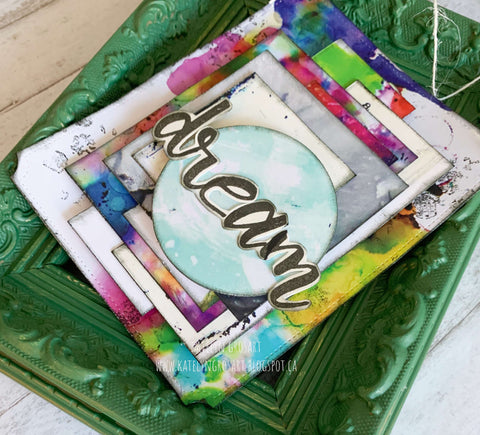
Here is the finished Dream Wall Hanging.
Wild Whisper Supplies Used:
- Nicole Wright Designs - Media Assemblage 12x12 Paper Pack
- Nicole Wright Designs - Bubble Snap Stamp Set
- Brush Script 6x8 Stamp Set
- Tim Holtz for Ranger Ink: Distress Ink - Black Soot and Blending Tool with Foam
- Ranger Ink: Jet Black Archival Ink
- Elizabeth Craft Designs: Stitched Indented Rectangle
- Misc: White Twine
I hope that I’ve inspired you to recreate my Dream Wall Hanging at home. For a discount on any of the products I've used today, make sure to use code: DTKATELYNG Make sure to continue to stop by the blog as the design team has loads of inspiration for you!
